
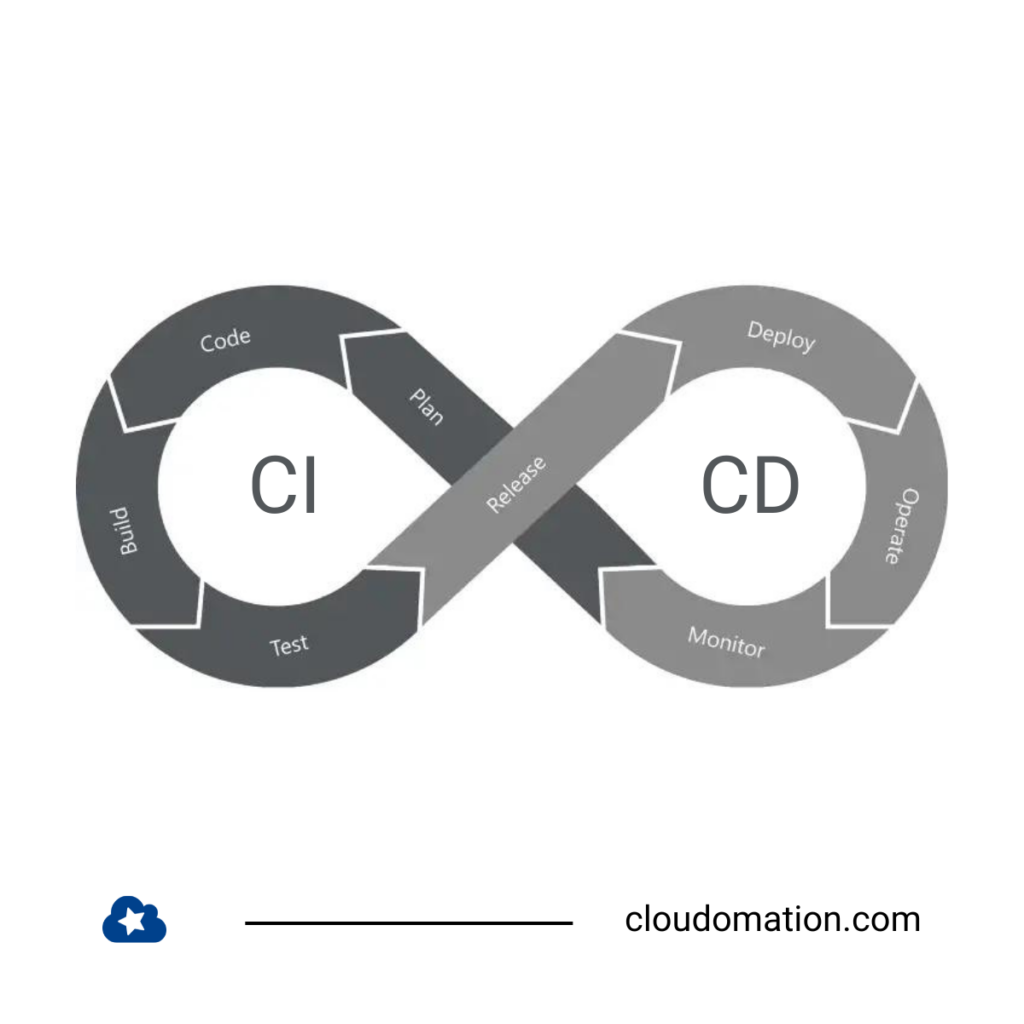
Our CI/CD pipeline
First of all: There are various tools for creating a CI/CD pipeline. One tool that is often used is Jenkins. Our CI/CD pipeline is implemented with our product Cloudomation. You can read about the exact differences between Cloudomation and Jenkins on our comparison page.
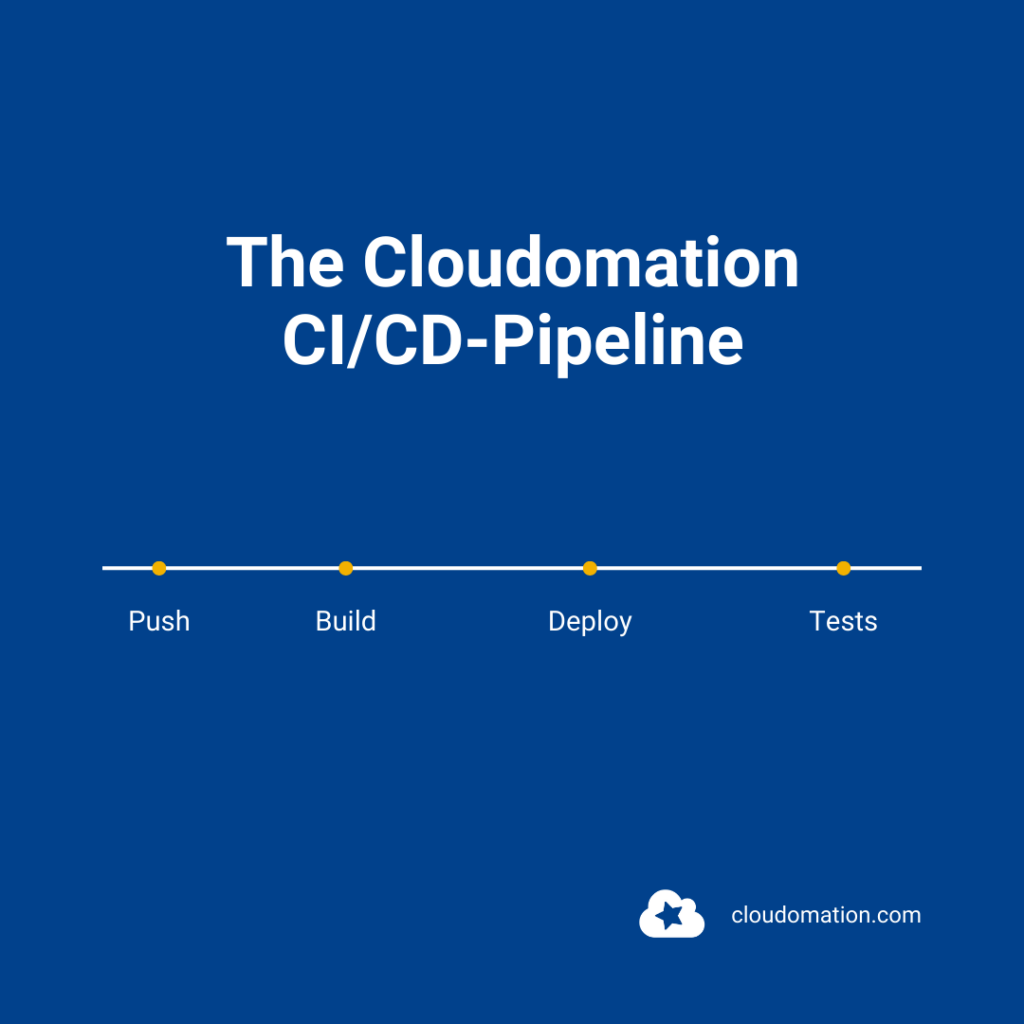
Structure of our CI/CD pipeline
Essentially, the Cloudomation pipeline consists of the following steps:
- Receive push
- Process push
- Process build request
- Process deploy job
- Process integration jobs
Let’s look at the individual phases in detail.
#1 Receive Push
In this step, the pipeline is started via a webhook call from Gitlab. Every time a push is made to one of our repositories, Cloudomation Engine comes into play.
The following is included in this push:
- Who started the push,
- information about all the commits that are in that push.
Then the processing begins.
#2 Process Push
This step is quickly described: The build job is created and processing starts.
#3 Process build request
During processing, there is a branching to specific build flows – depending on the components. The individual build flows then create the build. To do this, these steps are necessary:
- Get sources
- Unittests
- Compilation
- Packaging
- Upload packages to the Artefact storage
- Master data check which systems should be automatically updated with the current component / branch. A deploy job is then created for each system and processing starts.
#4 Process Deploy Job
In this step, integration test jobs and deployments follow. If it is the internal system, an integration test job is created and processing starts. As in the previous step, this is followed by a branch to specific deploy procedures depending on the component. These carry out the actual deployments. These include, for example:
- Stop system
- Install updates
- Starting the system
- Import objects, etc.
Once this update step has been completed, integration test jobs are created again for the internal system. Smoke tests, system tests in the case of a nightly build, load tests and infrastructure tests also follow. Then the processing of the integration test jobs begins.
#5 Process integration test jobs
In this step, the user logs into the system and all integration tests of the selected category are started. Then it is time to wait and collect the results for review.
Why is the pipeline structured this way?
Our pipeline is mapped in our own product. This way we have a complete overview of all steps in one central place. If a step breaks, a link takes us directly to the actual execution and we can debug. Each step can also be restarted manually, for example:
- Build the same push again with new build scripts.
- Deploy the same build again (production / customer system).
- Run tests again or run more tests.
How is our pipeline optimised?
We would like to mention three optimisations here:
Optimisation No. 1: Modularity
Pipelines of different components all run in the same scheme. This means that there are not four different pipelines for four different components. With one central system, different requirements are mapped, e.g. in terms of technology or programming language.
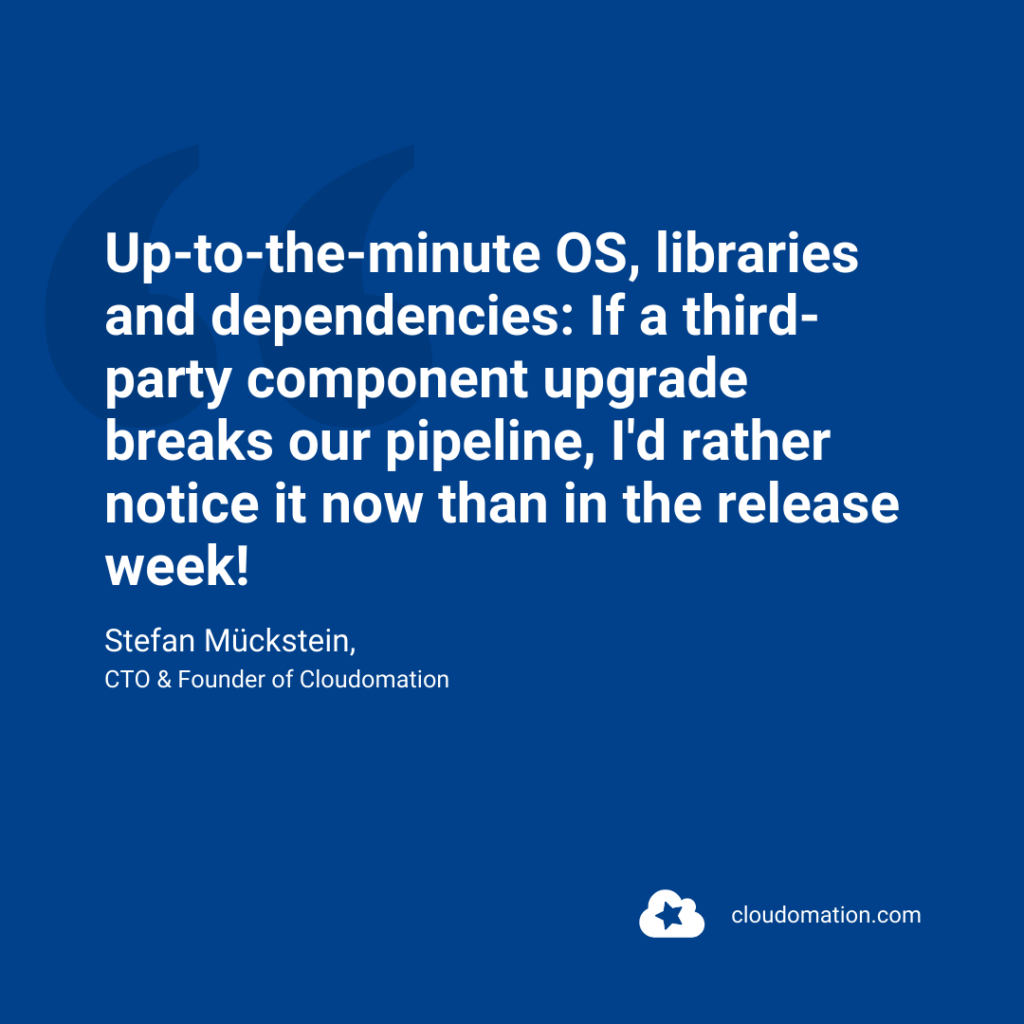
Optimisation no. 2: Avoiding side effects
Developers are often faced with the following problem: There is a build server that has been used for years. People shy away from updates because they are afraid that errors will occur. With Cloudomation, the builds always run on a fresh VM that has just been cloned. Updates are applied automatically. This way the server is always up to date.
Optimisation No. 3: Speed
Once a day, a completely new VM is set up, the corresponding tools, libraries and dependencies are installed, sources are cloned, users are set up, etc. The VM is then stopped and a snapshot is created. This snapshot is then used for the builds. It is updated daily, without legacy and deployed in seconds.


